

一、在CentOS 7中搭建Git服务器
环境说明
- CentOS 7.x 最小安***r> - 配置网络连接
1. 安装Git及创建用户
# 安装Git
$ yum install git

# 创建一个git用户组和用户,用来运行git服务
$ groupadd git
$ adduser git -g git
- 1
- 2
- 3
- 4
- 5
- 6
- 7
禁止git用户登录:
修改/etc/passwd文件,修改
# 找到这句:
git:x:503:503::/home/git:/bin/bash

# 改为:
git:x:503:503::/home/git:/bin/git-shell
- 1
- 2
- 3
- 4
- 5
2. 创建证书登录
$ mkdir /home/git/.ssh
$ chmod 700 /home/git/.ssh
$ touch 700 /home/git/.ssh/authorized_keys
$ chmod 600 /home/git/.ssh/authorized_keys
- 1
- 2
- 3
- 4
注意,如果是采用的sudo方式来创建git和相应的文件的,需要设置/home/git/.ssh/的owner为git,否则还是每次要输入密码的。
# owner改为git
$ sudo chown -R git:git /home/git/.ssh/
- 1
- 2
- 3
编辑/home/git/.ssh/authorized_keys,把客户端的公钥放进去,1个公钥1行。
附:如何创建私钥:
# 创建私钥,文件位于用户主目录里找到.ssh目录,里面有id_rsa和id_rsa.pub两个文件
$ ssh-keygen -t rsa -C "youremail@example.com"
- 1
- 2
- 3
3.初始化Git仓库
$ cd /srv
$ mkdir gitrepo
$ chown git:git gitrepo/
$ cd gitrepo

# 创建一个空的Git仓库,服务器上的Git仓库通常都以.git结尾
$ git init --bare project.git

# 将仓库所属用户改为git
$ chown -R git:git project.git
- 1
- 2
- 3
- 4
- 5
- 6
- 7
- 8
- 9
- 10
4. 克隆仓库
在另一台电脑上(下面称为:Client),安装git,并且运行下面的命令:
$ git clone git@10.123.123.123:/srv/gitrepo/project.git
- 1
- 2
5. 验证安装
5.1. 推送到远程服务器
在本地Client的project目录下,创建一个文件:text.txt,内容随意,然后上传到远端:
$ git push origin master
- 1
5.2. 检验
在本地Client的另外一个目录下,克隆一下:
$ git clone git@10.123.123.123:/srv/gitrepo/project.git
- 1
- 2
看看text.txt文件是否存在,内容是否对。
5.3. 常用的Git命令:
$ git add . 添加所有文件  注意有个 .
$ git commit -m '注释' 提交本地
$ git push origin master提交给默认分支
$ git -rm 删除
$ git pull origin master 从默认分支下载
$ git branch -v 查看所有分支
- 1
- 2
- 3
- 4
- 5
- 6
参考资料
https://my.oschina.net/u/2343829/blog/644663
二、CentOS下搭建git服务器
CentOS下搭建git服务器
1、首先需要安装git
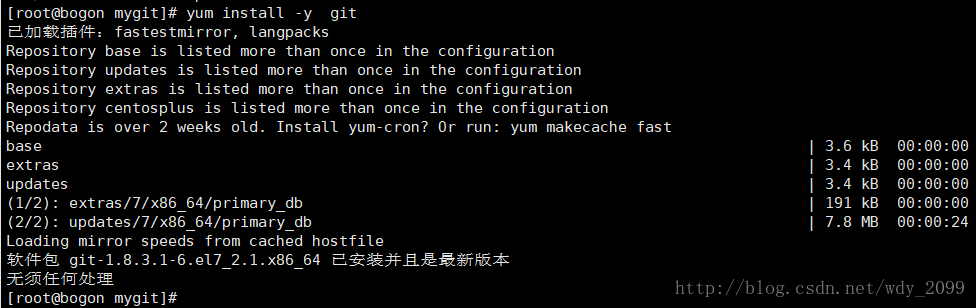
可以使用yum源在线安装:
[root@localhost Desktop]# yum install -y git
- 1
2、创建一个git用户
用来运行git服务
# adduser git
- 1
修改git用户密码:
# passwd git
- 1
输入和确认新密码即可
3、初始化git仓库
这里我们选择/opt/mygit/learngit.git来作为我们的git仓库
[root@localhost git]# git init --bare learngit.git
Initialized empty Git repository in /opt/mygit/learngit.git/
- 1
- 2
4、把仓库的owner改为git用户
执行以上命令,会创建一个裸仓库,裸仓库没有工作区,因为服务器上的Git仓库纯粹是为了共享,所以不让用户直接登录到服务器上去改工作区,并且服务器上的Git仓库通常都以.git结尾。然后,把仓库的owner改为git用户:
[root@localhost git]# chown git:git learngit.git
- 1
这样就完成了git的搭建。
5、在客户端clone一下远程仓库
第一次clone,输入yes

输入git用户的密码

克隆完毕:空的仓库

6、创建SSH Key
首先在用户主目录下,看看有没有C:\Users\wangdy\.ssh目录(Windows),如果有,再看看这个目录下有没有id_rsa和id_rsa.pub这两个文件,如果已经有了,可直接跳到下一步。如果没有,打开Shell(Windows下打开Git Bash),创建SSH Key:输入你自己的email,一路回车即可。
ssh-keygen -t rsa -C “wangdy@126.com”
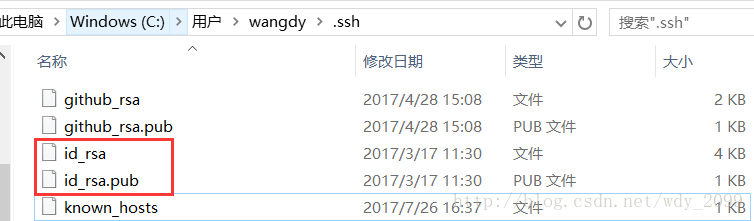
其中,有id_rsa和id_rsa.pub两个文件,这两个就是SSH Key的秘钥对,id_rsa是私钥,不能泄露出去,id_rsa.pub是公钥,可以放心地告诉任何人。
7、Git服务器打开RSA认证
回到git服务器上,到/etc/ssh目录,
将以下3项作如下修改:其实就是找到这3行,将#注释去掉即可
RSAAuthentication yes
PubkeyAuthentication yes
AuthorizedKeysFile  .ssh/authorized_keys
- 1
- 2
- 3
可以看到公钥存放在.ssh/authorized_keys文件中。所以我们在/home/git下创建.ssh目录,然后创建authorized_keys文件,并将刚生成的公钥导入进去。
8、禁用git用户的shell登陆
出于安全考虑,第二步创建的git用户不允许登录shell,这可以通过编辑/etc/passwd文件完成。找到类似下面的一行:
git:x:1003:1003::/home/git:/bin/bash (本次测试实际)
- 1
最后一个冒号后改为:
git:x:1003:1003::/home/git:/usr/bin/git-shell (本次测试实际)
- 1
这样,git用户可以正常通过ssh使用git,但无法登录shell,因为我们为git用户指定的git-shell每次一登录就自动退出。
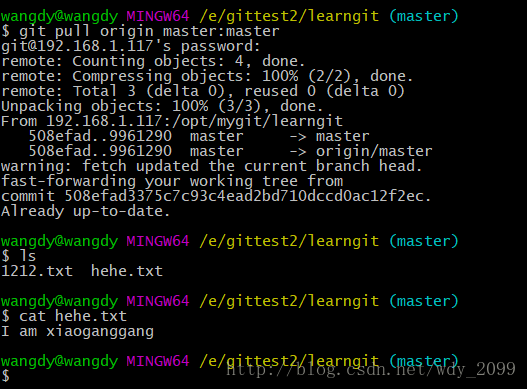
9、实际操作
机器A:
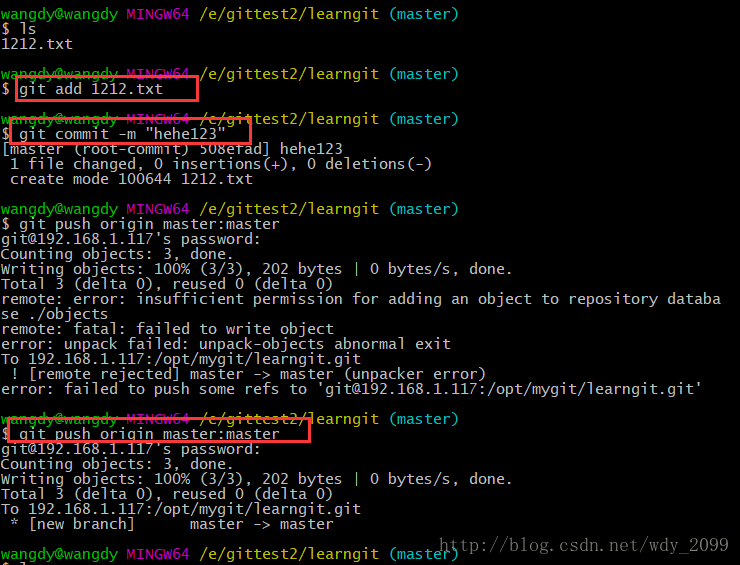
中间错误,是由于文件目录权限的问题:
机器B:
那,这样就完成了git服务器搭建的整个流程了。很多公司都用gitlab,研究后,再分享吧。
三、在CentOS搭建Git服务器
在CentOS搭建Git服务器
前言
我们可以GitHub发布一些开源代码的公共仓库,但对于私密仓库就需要收费了。公司内部通常会搭建自己的Git服务器,我也通过在自己的服务器上搭建练习一下。
开始前先说一下服务器信息,这里是阿里云的CentOS 6.5 64位操作系统。
一 确认服务器是否安装Git
[root@iZ25r8k6ifuZ git]# rpm -qa git
git-1.7.1-3.el6_4.1.x86_64
这里也已经安装过了,如果没有安装可以用yum install git 安装。
二 创建git用户
这里你可以选择新建一个用户来测试,也可以直接使用你的root进行以下操作。笔者也是看着资料一步一步来的,这里创建一个新用户teslachen进行操作。
[root@iZ25r8k6ifuZ ~]# useradd tesla
[root@iZ25r8k6ifuZ ~]# passwd tesla
更改用户 tesla 的密码 。
新的 密码:
无效的密码: 它没有包含足够的不同字符
无效的密码: 过于简单
重新输入新的 密码:
passwd: 所有的身份验证令牌已经成功更新。
注1:创建用户权限不够请加上sudo;
注2:设置用户密码太过简单的话会有提示,但依旧可以设置成功。
三 生成ssh公钥
许多 Git 服务器都使用 SSH 公钥进行认证。 为了向 Git 服务器提供 SSH 公钥,如果某系统用户尚未拥有密钥,必须事先为其生成一份。
linux 可以在本机运行ssh-keygen -t rsa生成密钥,把.pub文件拷到服务器上。
[root@iZ25r8k6ifuZ ~]# su tesla
[tesla@iZ25r8k6ifuZ root]$ cd ~
[tesla@iZ25r8k6ifuZ ~]$ mkdir .ssh
[tesla@iZ25r8k6ifuZ ~]$ ssh-keygen -t rsa
Generating public/private rsa key pair.
Enter file in which to save the key (/home/tesla/.ssh/id_rsa):
Enter passphrase (empty for no passphrase):
Enter same passphrase again:
Your identification has been saved in /home/tesla/.ssh/id_rsa.
Your public key has been saved in /home/tesla/.ssh/id_rsa.pub.
The key fingerprint is:
13:bf:75:ba:67:7f:0e:a0:47:7a:fe:25:bc:81:85:c3 tesla@iZ25r8k6ifuZ
The key's randomart image is:
+--[ RSA 2048]----+
| |
| |
| . |
| o . . |
| S . E o |
| . * O |
| + = = .|
| + .o*.|
| o+oo+|
+-----------------+
[tesla@iZ25r8k6ifuZ ~]$ cd .ssh/
[tesla@iZ25r8k6ifuZ .ssh]$ cat id_rsa.pub >> ~/.ssh/authorized_keys
exit
四 添加tesla到sudoers文件
tesla用户现在对一些文件夹没有操作权限,修改/etc/sudoers文件来改变他的权限。最高管理员用户用下面命令打开。
[root@iZ25r8k6ifuZ ~]# visudo
然后我们在vim中找到下面这行
root ALL=(ALL) ALL
按i键开始插入,回车一下在下面一行加上
tesla ALL=(ALL) ALL
接着按下esc键,输入 :wq ,回车保存退出
五 创建Git代码仓库
[root@iZ25r8k6ifuZ ~]# mkdir /teslaRepo
[root@iZ25r8k6ifuZ ~]# cd /teslaRepo/
[root@iZ25r8k6ifuZ teslaRepo]# sudo mkdir teslaProject.git
[root@iZ25r8k6ifuZ teslaRepo]# chown tesla:tesla /teslaRepo/
[root@iZ25r8k6ifuZ teslaRepo]# chown -R tesla:git /teslaRepo/
[root@iZ25r8k6ifuZ teslaRepo]# cd teslaProject.git/
[root@iZ25r8k6ifuZ teslaProject.git]# sudo git --bare init
Initialized empty Git repository in /teslaRepo/teslaProject.git/
这样一个叫teslaProject得Git仓库就创建好了
六 本地测试使用
你可以直接在服务器上进行本地测试,也可以直接用你的电脑来测试。下面我是使用自己的MBP来进行的测试。
localhost:~ okay$ cd Desktop/git/
localhost:git okay$ mkdir teslaRepo
localhost:git okay$ cd teslaRepo/
localhost:teslaRepo okay$ git init
Initialized empty Git repository in /Users/okay/Desktop/git/teslaRepo/.git/
localhost:teslaRepo okay$ git remote add origin tesla@123.57.159.74:/teslaRepo/teslaProject.git
上面的命令在本地创建了一个文件夹并添***务器上的远程仓库
localhost:teslaRepo okay$ touch a.txt

localhost:teslaRepo okay$ git add a.txt

localhost:teslaRepo okay$ git commit -m “init commit”

[master (root-commit) d14cd3b] init commit

1 file changed, 0 insertions(+), 0 deletions(-)

create mode 100644 a.txt
上面的命令在本地创建了一个a.txt并在本地提交了一次
localhost:teslaRepo okay$ git push origin master

tesla@123.57.159.74’s password:

Counting objects: 3, done.

Writing objects: 100% (3/3), 202 bytes | 0 bytes/s, done.

Total 3 (delta 0), reused 0 (delta 0)

To tesla@123.57.159.74:/teslaRepo/teslaProject.git

[new branch] master -> master
上面的命令将本地代码push到远程服务器上去了,下面我们在本地clone一次看下是否正确
七 本地clone
localhost:git okay$ mkdir ttt
localhost:git okay$ cd ttt
localhost:ttt okay$ git clone tesla@123.57.159.74:/teslaRepo/teslaProject.git
Cloning into 'teslaProject'...
tesla@123.57.159.74's password:
remote: Counting objects: 3, done.
remote: Total 3 (delta 0), reused 0 (delta 0)
Receiving objects: 100% (3/3), done.
Checking connectivity... done.
clone完成,让我们看一下文件夹目录

之前push到服务器上的a.txt文件已经被clone下来
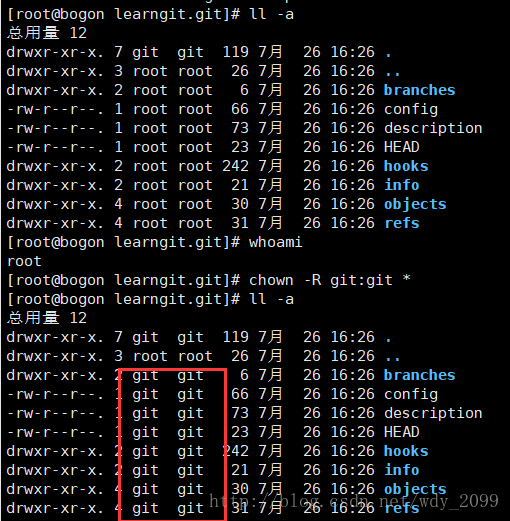
注:
按上述步骤来,最后在客户端上面提交git push origin master 时会出现:
error: unpack failed: unable to create temporary object directory
这是权限不足,不能创建文件夹。
直接:
[root@iZ25r8k6ifuZ teslaProject.git]# chown -R git:git *

 京公网安备 11010502036488号